Several weeks ago, I created a pin board on Pinterest entitled “Pin it, Wear it” for a contest Favecrafts was hosting. I then challenged myself to re-create everything I pinned on to that board. I’ve deduced that I have some lofty goals, now that I’ve taken the time to review them. I’m a bit nervous.
So, you can just imagine when I picked this project, I thought this one was going to be ridiculously easy. And it is…once I found the right materials. Let me back up for a moment. For those of you who don’t know, a shrinky dink is a piece of plastic that is decorated and then baked in an oven to which the plastic ends up being approximately 1/3 its original size and 9 times thicker. Mind boggling, I know. It’s amazing. I love it. It was invented sometime in the 70s.
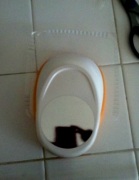
I wanted this to be a truly upcycled project. I didn’t want to go buy a Shrinky Dink kit, or go to a bulk store and buy containers. I wanted to find a container that would’ve been thrown away. After weeks of looking at the bottom of every plastic container I had, I finally found one!
At the bakery section of Ralphs, the pumkin chocolate chip cookies container had #6 on it! Cookies and a shrink medium. We won twice that day!
Let’s shrink the dink!
Materials needed:
- Plastic container with the recycle symbol and the #6 inside. Do NOT use any other types of plastic. Results are not guaranteed and frankly, it just isn’t safe.
- Sharp scissors
- A 3.5 inch diameter hole punch or a circle template or whatever shape you want. Plan for 2/3 shrinkage.
- Permanent markers (like Sharpies) and/or colored pencils
- Sand paper
- Regular hole punch
- Toaster oven or conventional oven (250 degrees)
- rolling pin or heavy flat surface (I used a mason jar)
- Clear nail polish
- jump ring
- necklace chain
- jewelry making tools (e.g. needle nose pliers)
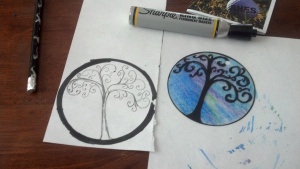
First, plan your design. Nothing too fancy or intricate. You won’t be able to see all those details once they’ve shrunk. I chose a tree of life motif and free handed it after getting some inspiration from Google.
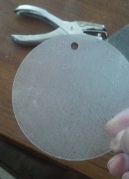
Cut out your piece and sand down one side. You’ll know you’ve sanded it down enough when the entire piece is opaque. Sanding it will give a textured surface for the colored pencils’ color to adhere to. Punch a hole on the top not too close to the edge.
Using the colored pencils and markers, draw and fill in your design. In retrospect, I should have picked lighter colors or not colored so thickly as the colors become more intense when it shrunk. For a finished look, I took a black sharpie and colored the edge of the circle.
Place in a preheated oven set at 250. In less than 10 seconds it will shrivel and then shrink. If it doesn’t completely flatten, take it out quickly and flatten it with the rolling pin or mason jar.
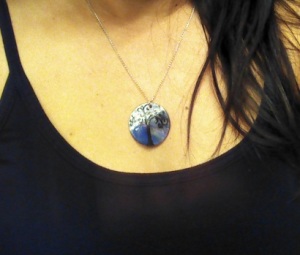
Once cooled, paint on a few layers of the clear nail polish onto the rough side of the shrinky dink. This will seal the colored pencil. Add the jump ring and necklace.
Ooh and ahh over the miracle of science! Who knew that thin, flexible polystyrene plastic (#6) sheets would shrink? 2 Cub scout moms figured that out 40 years ago. Go, moms!


I LOVE this!!
It’s so fun to do! I’m digging around all the recycle bins looking for this plastic! I hope to try to make a bracelet next! Give it a try! I’d love to see your creation!
I really love this project and that you used the cookie container to do it. It’s a two-fer!!!
Saving the envirornment one craft at a time!
LOL, I used the same cookie container!! Gosh those pumpkin cookies are good! To save myself, though, I have also found that the croissant containers are also #6. This is much less dangerous than having a package of cookies in the house!! I love the way the colored pencils look. I’ll have to try that next!
I love that you went out of your way to use a container that would have wound up in the trash! The pendant looks great too!
This is really cute! I’ve always wanted to try shrinky dink. Maybe I will someday.