In the land of diaper cake crafting, there are three subsets. (Ha! Seriously, there is a diaper cake crafting land.) The first subset is the ‘individually rolled diapers’ cake. As the name suggests, each diaper is carefully rolled into a tube, somehow bound together to each other and formed miraculously into a beautiful tiered cake. Then there’s the “diapers not rolled individually” cake. As this name suggests, the diapers are typically bound together in harmony usually in a spiral pattern and then stacked together in graduated unison to create a beautifully tiered cake. Finally, there’s the “diapers sculpted into other things” cake. These cakes are the diaper cakes that win prizes and bring peace to warring nations. Not really, however they are truly amazing. This golf bag diaper cake, this tricycle, this train, and this giraffe (GIRAFFE?! What is this diaper madness?!) are just a few of these awe-inspiring diaper sculptures! I bow down to you, wizard crafter, as you have defied the laws of physics.
Here are a few of the diaper cakes I’ve made befitting of the 2nd subset I have mentioned above.
Let’s make this one!
Materials needed:
- Diapers – Find out what baby mama prefers and get those. These diapers are a size 1. I bought the smallest pack I could find. I’ve made diaper cakes with packages that had more, and that can be better as you’ll have more diapers to work with, however, you might have a few extra.
- Cylinder shaped wine bottle box – I bought mine at Big Lots after Christmas. I think this one was a buck.
- Large round cardboard cake base – you can find these at Michael’s in the cake decorating section, or you can make one like I did out of a cardboard box. You’ll want it about an inch or so larger than the diameter of the bottom level tier. Mine turned out to be about 13 inches in diameter.
- Coordinating ribbon – enough to go around each tier of the cake, to create any bows for the cake itself, for the cake topper and for the bow when the cake is packaged. I had a spool of 6 yards of the pink ribbon and purple ribbon and I still have some left over.
- Elastic, rubber bands or other stretchy cording
- Goodies to place inside the wine bottle – I usually put stuff for the new mom in there. Some suggestions: an actual bottle of wine, Bath & Body Works lotions and soaps, nursing bra, lanolin and nursing pads, nail polish makeup and jewelry.
- A washcloth to cover the top
- Diaper cake topper – I used a stuffed animal in this one. Crochet a cute amigurumi creature that fits the baby’s room theme, use baby booties, make a little bouquet of sock flowers, a piggy bank, whatever would look cute on top of the cake
- coordinating wrapping paper – optional if you want to cover the cake round base
- cello or tulle – to wrap the cake with
- double stick tape
Taking the wine bottle box, place whatever small trinkets you want inside.
Sometime I take an outfit, or a receiving blanket, or wash cloths and wrap it around the bottle box first. This helps to give the bottom tier more girth, especially if you don’t have a lot of diapers in your pack. Secure with your elastic cording. I used yarn which was not that stretchy, however it worked. Use what you have.
Taking a few diapers at a time start layering them against the bottle in a spiral. Make sure to leave enough diapers to create the middle and top tiers. Using your elastic string, tie off.
Using the same process, make the middle tier.
Before layering the top tier, I covered the top of the wine bottle box with a coordinating colored wash cloth. This is purely for aesthetic reasons as I wanted everything to match.
You’ll notice that there doesn’t seem to be much difference in the widths of the three tiers. This is where you start adding and subtracting diapers to each tier until it is to your liking. Make sure the washcloth on top is smooth and laying flat, unlike the picture above. Then place your cake topper on top. I used a penguin since my recipient likes them and added a pink bow to coordinate with everything else.
Wrap each tier with a length of ribbon and secure with double stick tape. Make sure it is snug and your ribbon covers the elastic.
If you need to, make your cake base:
I decided to cut two circles and tape them together to ensure the base was sturdy.
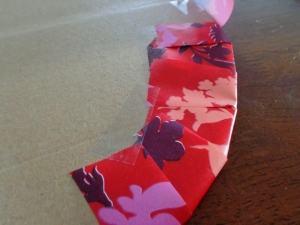
Take a section of wrapping paper and trim a circle around your base about an inch or so larger around the base. Then tape as you go until all the flaps are secured. Then cut out another circle to cover all the raw edges.
Place the base on top of a large section of cellophane or tulle. Then, carefully place your diaper cake on top of the base. Wrap by gathering and tie off with the ribbon.
There you have it!


I have wanted to make one of these for forever. I finally have a couple friends who are pregnant so I can try it. Thanks for the great advice!
Please share some pictures of what you make. I’d love to see what you create!
So cute! I love this diaper cakes! So helpful when you have a baby!
http://www.littleprettymess.com
Thank you! I hope my friend’s daughter likes it!
This is absolutely gorgeous and original, thanks for posting 🙂